
How to build a simple robot with Arduino and 3D printer
How to build a robot in 5 simple steps : Creating a robot and make a robotic machine perform what you want is easy and fun! Most of the people want to see a robot perform the simple tasks like moving around or respond to simple commands . You can make a robot completely from simple DIY components or buy a DIY starter kit from scratch!
STEM technique
Building your own robot is a great way to teach yourself both electronics as well as computer programming and its recommended for kids to improve their problem solving techniques . Stem Toys are Science, Technology, Engineering, and Math based toys geared towards learning, curiosity, and education.
How much DIY robot costs ?
Cost depends on the complexity of the robot, hobby robot can be expensive as 30$ to 100$. New industrial robotics can cost from $50,000 to $80,000. Once application-specific peripherals are added, the robot system costs anywhere from $100,000 to $150,000
Step 1 – Choose the task that your robot should perform:
If you robot should move around then you will need several motors and wheels, a controller for motors and a microcontroller as brain. A battery and distance sensors is the basic for this kind of robot.
Here is some examples :
Simple Obstacle Avoiding-Robot using Arduino Nano and-Ultrasonic-Sensor:
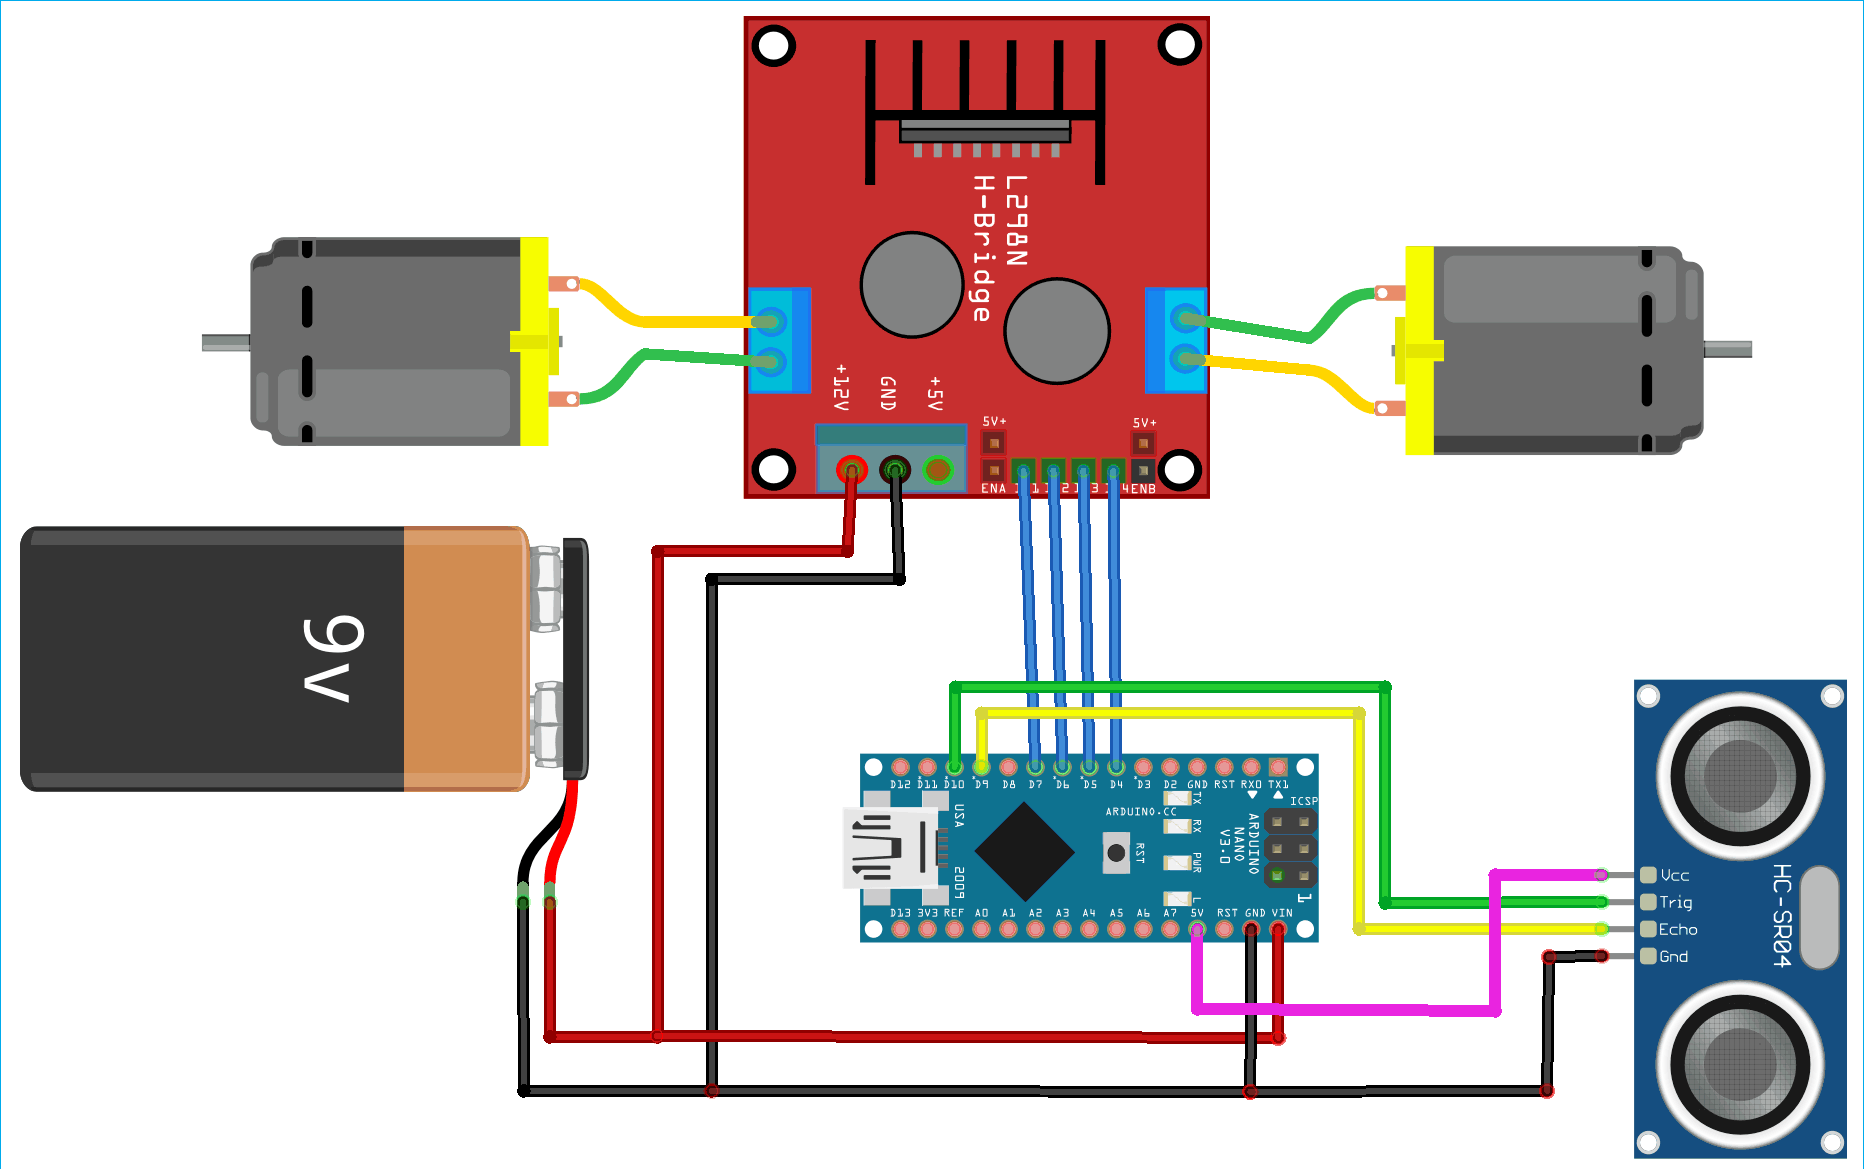
Find the Code here : 2wd_Obstacle-Avoiding-Robot
Advanced – Bluetooth Controlled Card using Arduino and Ultrasonic Sensor
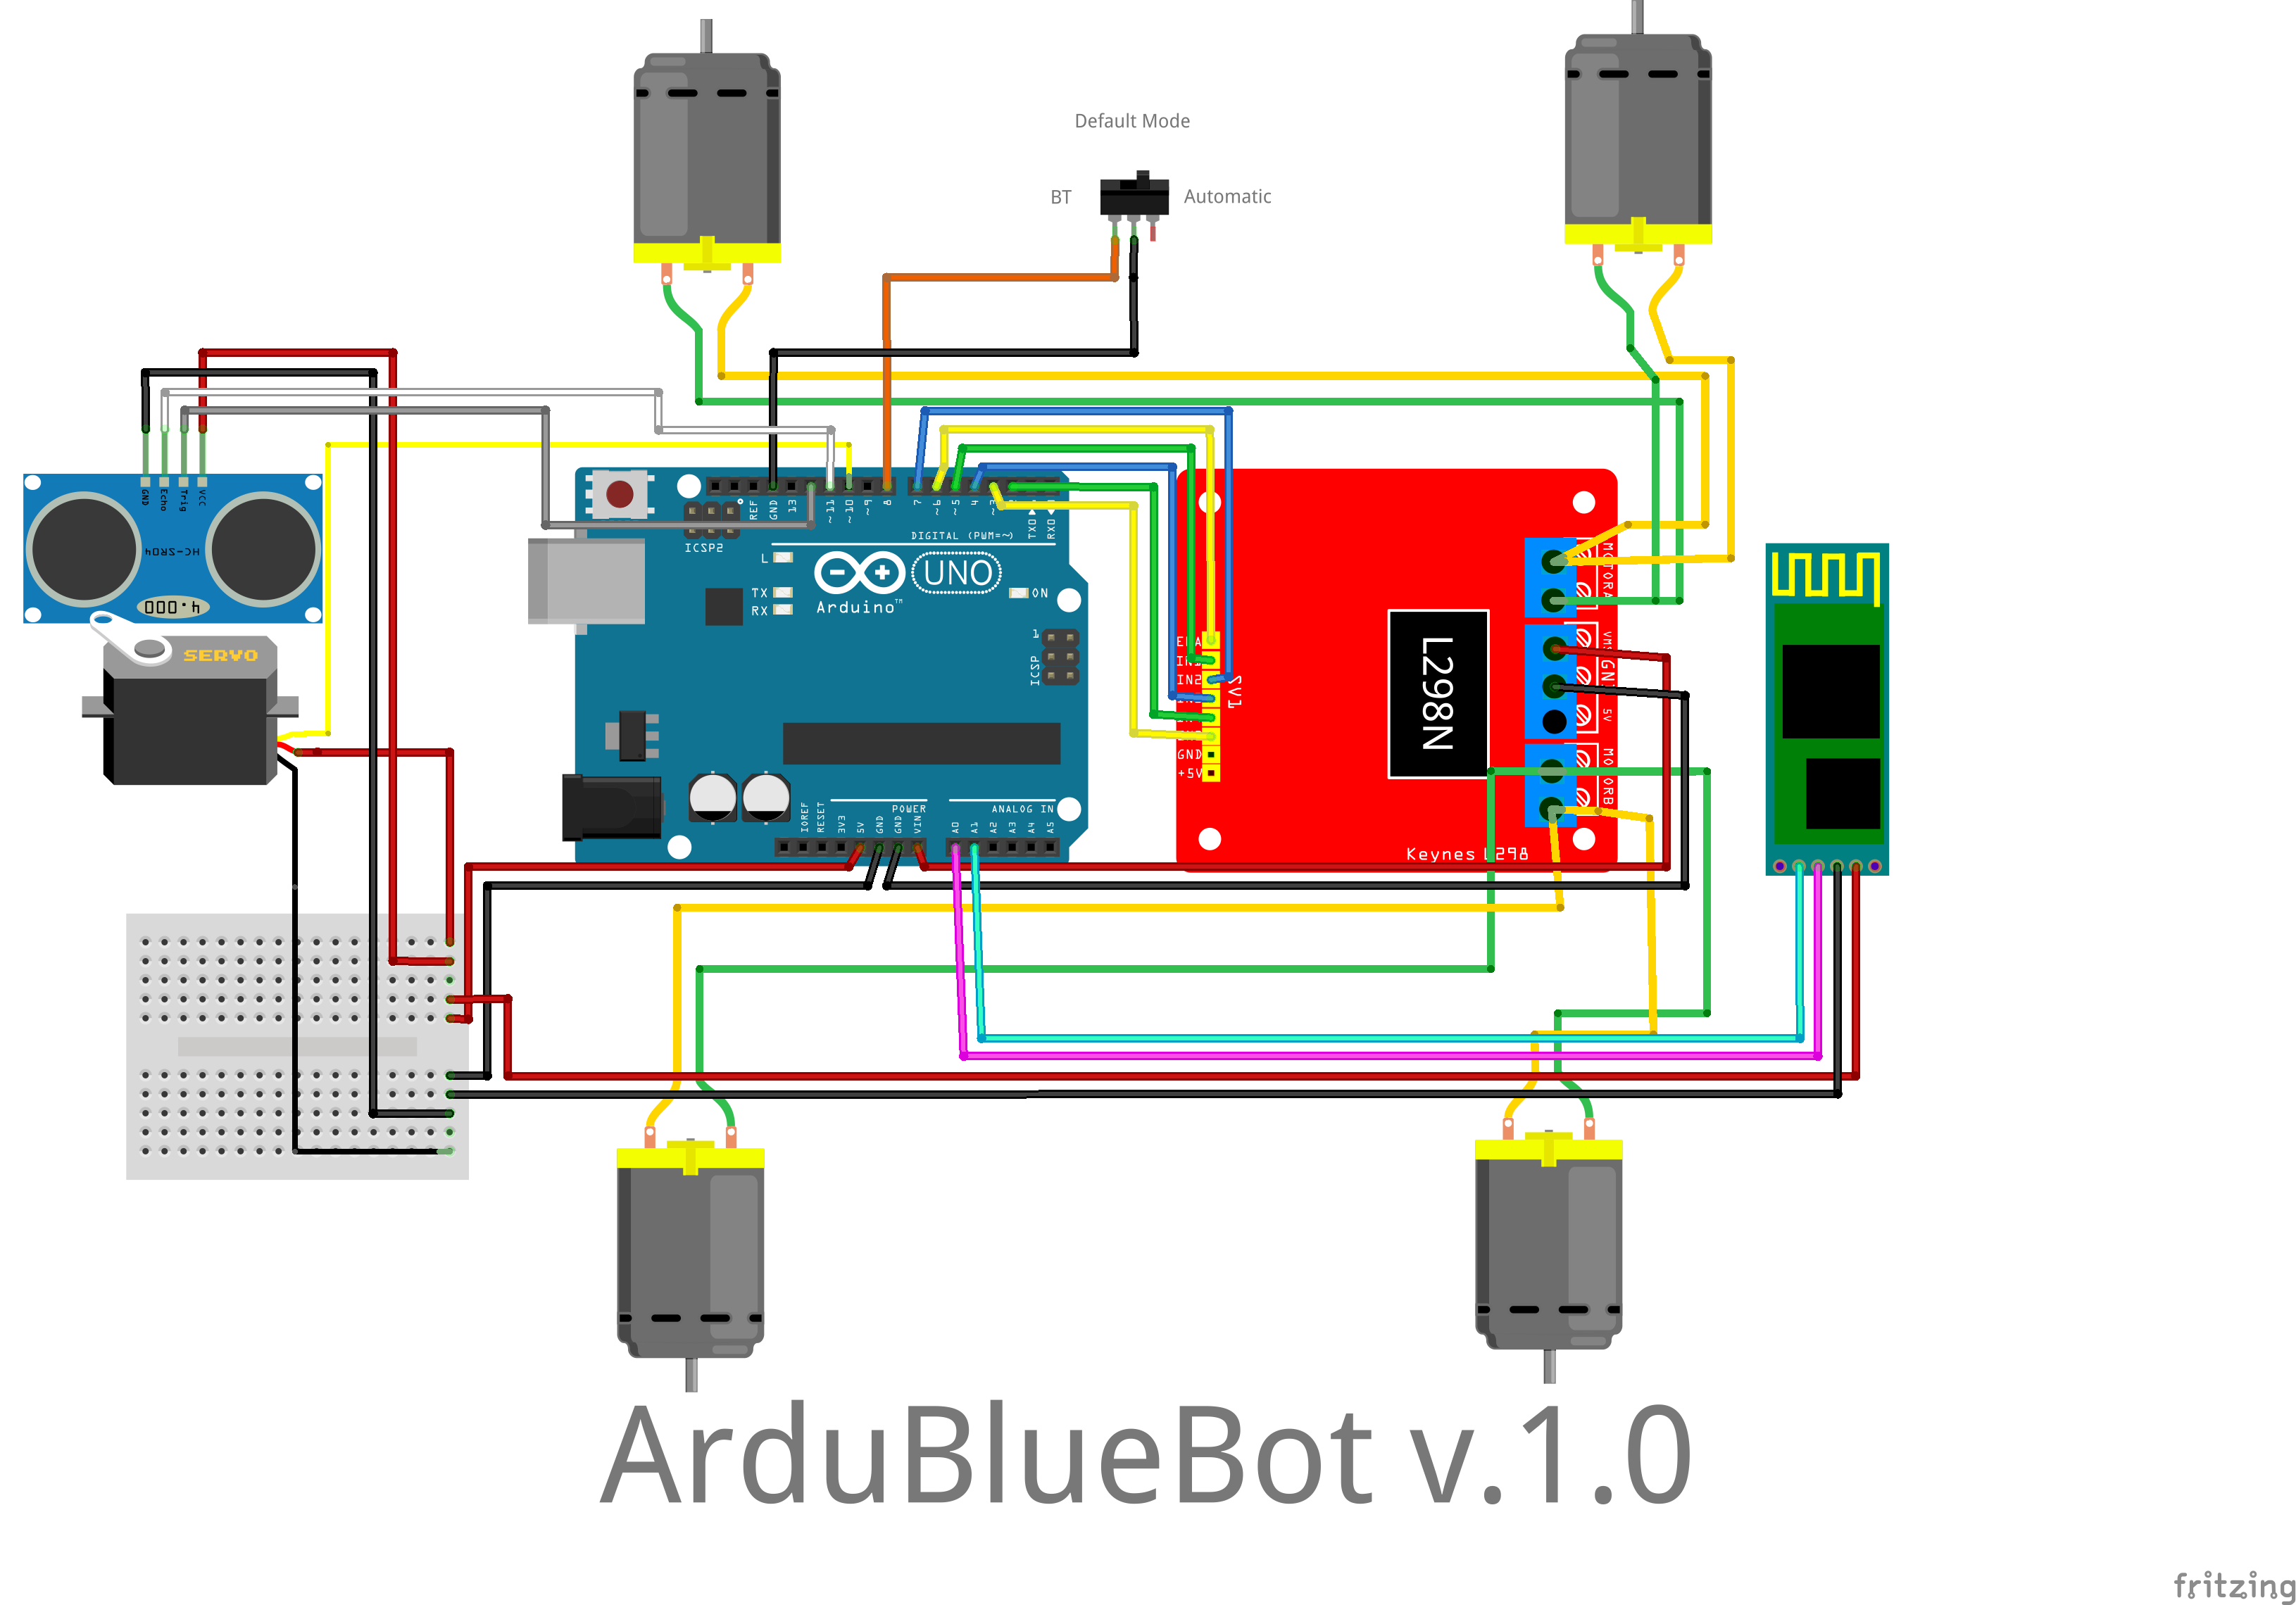
Find the code here : ArduBlueBot v.1
Step 2 – Gather components

The list of components for a generic robotic project includes the following:
- Arduino Uno R3/Mega/Nano
- Ultrasonic Range Finder Sensor – HC – SR04
- Motor Driver IC – L293D
- Servo Motor (Tower Pro SG90)
- Plexiglass/ Plastic / Wood Body
- Wheels
- Power Supply / Battery
Can’t find some parts? Buy a robotic kits !
Step 3 – Assemble your Robot
Step 4 – Setup your computer and coding
1. Install Arduino IDE
2. Install dependance libraries
3. Plug-in Arduino in your Computer
4. Download & Install Arduino Driver ( if you using CH4030 drivers, download from here )
5. Select Tools > Board > Arduino
7. Select Tools > Port > and check that a new port will appear when pluggin your Arduino to your PC
6. Verify that you can upload code
Step 5 – Code your robot
Well done you are now able to code your robot !
Bonus – 3D print your robot enclosure !
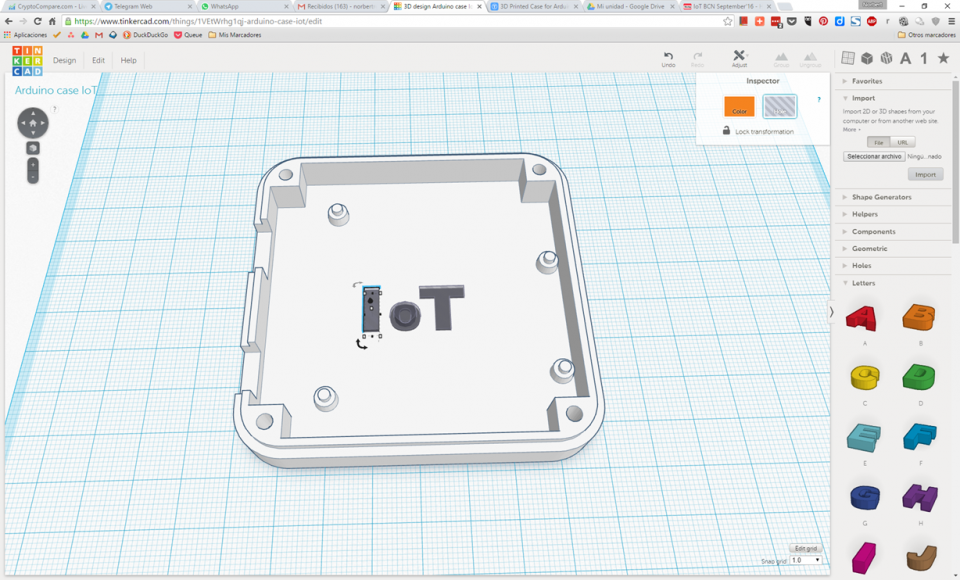
TinkerCAD is like “Minecraft” for modelling : Tinkercad is easy to use, simple and allows working with STLs directly ( for 3D printing). The software run online with your personal account in the “cloud”. We recommend this for youngers who want to build and print their creations!
Looking for a good 3D printed? Check those models: